By Jimmy
 21 Aug, 2026
 8 Minutes Read
Reviewed by Angtai's Technical Services team — the group of 30+ R&D and technical specialists who detail wall assemblies for the company's OEM/ODM and export projects.
A rainscreen system is a wall assembly with a drainage and ventilation space behind the exterior cladding, allowing water that crosses the outer skin to drain and the wall to dry. This guide explains the common components and design questions; exact cavity, fixing, flashing, fire-stopping and wind-load details must come from the selected tested system and project requirements. For product-specific scope, see flexible stone panel integration.
A rainscreen system is built from four functional layers: the structural wall, a water-resistive barrier (WRB) or sheathing membrane, an air cavity, and an outer cladding layer that's held off the wall rather than fastened flush against it. That air cavity is what separates a true rainscreen from a face-sealed veneer — a cladding nailed or glued directly to sheathing with no gap has nowhere for moisture to go if a joint or seal ever fails.
The cavity does two jobs at once. It moderates the pressure difference between outside wind and the space behind the cladding, which reduces the suction that pulls water through joints and fastener holes. And it gives any water that does get through a path to drain back out and air to circulate and dry the assembly. Both functions matter more than the cladding's face-sealing alone, because no exterior finish — masonry, panel, or siding — stays perfectly sealed for the life of a building.
Rainscreen design follows two working rules: keep water out, and let water out if it gets in anyway. The cladding and its joints handle the first rule by shedding the bulk of rainfall. The cavity and drainage plane handle the second, which is the part most face-sealed systems skip entirely.
Cavity depth is set by tested system details, cladding and support design, exposure, drainage and ventilation needs, fire-stopping and local requirements; a single dimension should not be copied between projects. The water-resistive barrier, cavity and fire-performance scope also solve different requirements, so adding furring alone does not establish compliance for the complete wall.
The most common failure our technical team traces in the field isn't a bad gap dimension — it's a cavity that got closed off at the top or bottom. Furring run tight against trim, or a parapet detail with no vent path, turns a properly built rainscreen into a sealed box that traps whatever moisture does get past the cladding instead of drying it out.
Every rainscreen, regardless of cladding material, is built from the same sequence of layers:
Cladding dead load, panel format, wind load and substrate capacity determine how the subframing is sized. Lightweight boards and thin facing panels may reduce demand compared with masonry or thick stone, but the support system still requires project-specific engineering and approved fasteners. Compare lightweight cladding materials separately from non-combustible wall panel requirements, because weight and fire classification answer different design questions.

Rainscreens generally fall into three functional categories. Vented rainscreens are open at the bottom and closed at the top, focused mainly on draining moisture and reducing condensation behind face-sealed claddings. Drained-and-back-ventilated rainscreens combine a drainage path with continuous airflow top to bottom, giving both fast drainage and active drying — the most common approach for panel and board claddings. Pressure-equalized rainscreens go a step further, compartmentalizing the cavity and controlling vent openings so pressure inside roughly matches pressure outside, cutting the suction that drives water through joints.
Pressure-equalized designs use compartmentation and controlled vent openings to limit wind-driven pressure across the cladding. Whether that approach is needed—and how compartments, baffles and fire-stopping are laid out—depends on building geometry, exposure, facade testing and the project engineer's design rather than a universal height or bay-size rule.
Each system type suits a different range of cladding weight and form, from panelized siding to masonry veneer — the full range of cladding types breaks down how each interacts with a rainscreen cavity.
There's no single best rainscreen for every siding job — the right approach depends on climate exposure and how much weight the cladding puts on the sub-framing. Wet, high-rainfall climates generally call for a fully vented, drained-and-back-ventilated cavity with generous top and bottom ventilation. Drier climates can sometimes get by with a thinner drainage gap created by a drainable WRB alone, though a true ventilated cavity still performs better over the long run.
Weight is the other deciding factor. Heavy masonry or stone veneer needs a substructure engineered for that load, while lightweight panel claddings — including flexible stone (soft porcelain) panels — mount on lighter furring or clip systems and adapt more easily to retrofits, curved walls, and high-rise installs where dead load matters. Rain Traces Stone Whispers shows how a stone-look finish can sit on a lighter-duty rainscreen assembly than natural veneer requires, while sandstone veneer panel guide covers a heavier stone-look option that still mounts lighter than natural stone for projects that need more mass.
Most rainscreen builds follow the same five-stage sequence: prepare and inspect the structural wall, apply and seal the WRB, install furring or sub-framing to set the cavity depth, add insulation where specified, and fasten the cladding with venting left open top and bottom. Flexible stone panels layer eight additional steps onto that base sequence: leveling and cleaning the substrate, priming with an interface agent, spreading adhesive on the panel back, pressing the panel into place, adjusting its position, temporarily fixing it with wood blocks or gas nails, trimming the edges to fit, and cleaning off adhesive residue before it cures.
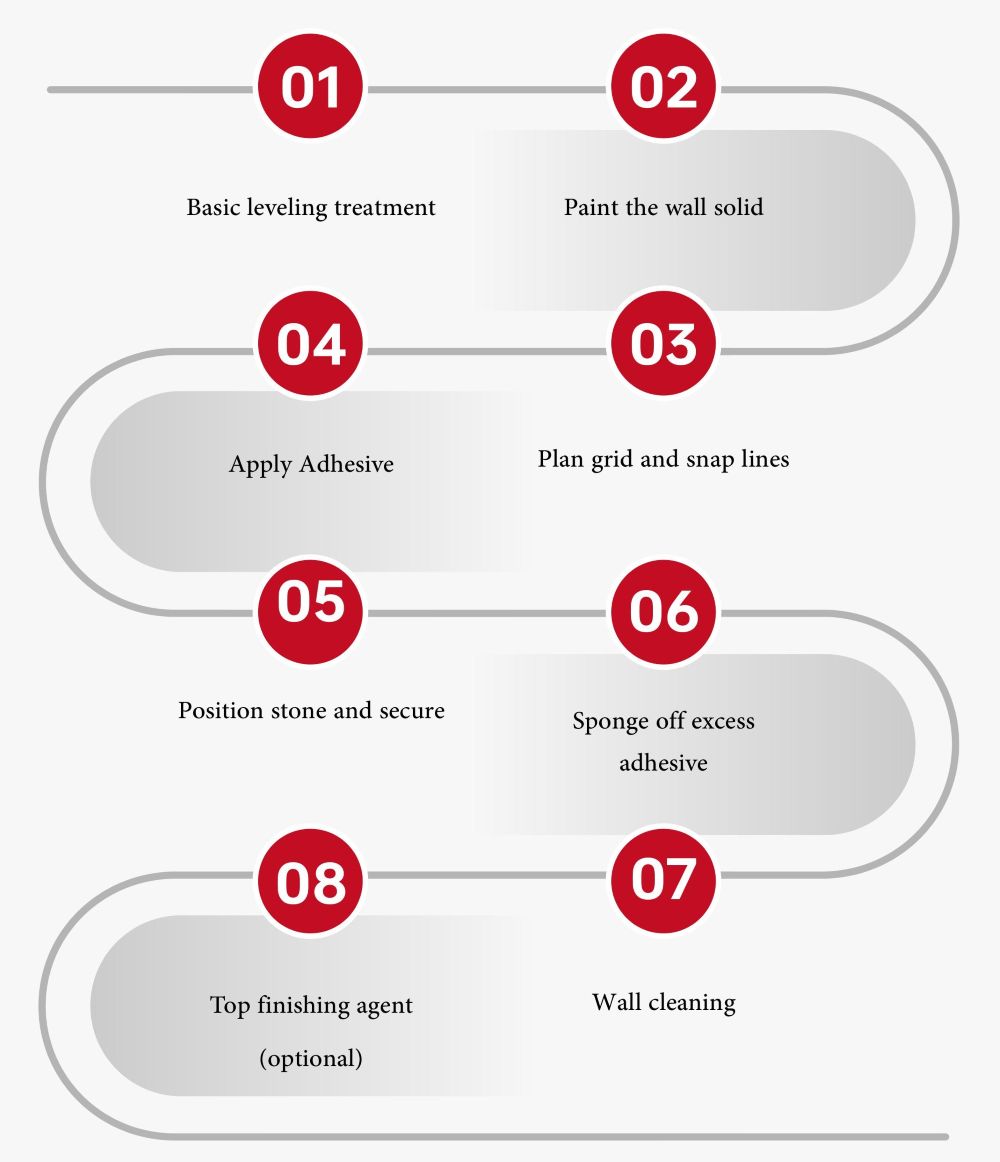
The Angtai Flexible Stone Installation Guide walks through substrate prep, adhesive application, and edge-cutting in full, and substrate compatibility for stone-look claddings — concrete, OSB, calcium-silicate board, metal — varies by product, covered in the exterior stone panel guide.
Adding a rainscreen cavity introduces furring or subframing, flashings, vent details, labor and sometimes a drainage mat beyond the base wall assembly. Cost changes with cladding weight and format, cavity design, access, fire-stopping and regional labor, so a universal per-square-foot allowance is unreliable. Use the rainscreen system cost guide to identify the cost components, then obtain project-specific prices from the relevant system suppliers and installer.
Once the cavity, WRB, and sub-framing are settled, the remaining decision is which cladding sits on top of them — and that choice affects weight, fastening method, and how much of the substructure budget goes toward structural support versus finish. Flexible stone rainscreen cladding systems are one path for matching a panel product to a project's climate, height, and substrate. Suppliers differ mainly in cavity-depth hardware, venting accessories, and cladding-specific clips; the current rainscreen cladding options compare what each one actually includes. Angtai's technical team reviews wall-assembly details and substrate compatibility on request — request a wall-assembly review before finalizing a substructure design.
Do residential homes need a rainscreen system?
Most residential exteriors benefit from one, since no cladding stays perfectly sealed for a home's lifetime. Homes in high-rainfall or high-humidity regions see the most benefit, but even drier climates can face moisture problems from irrigation, condensation, or one bad flashing detail without a drainage cavity.
What are typical rainscreen wall construction details?
A typical assembly runs structural wall, WRB, insulation, sub-framing or furring that sets the cavity depth, the ventilated air gap itself, and the cladding. Flashing at penetrations, windows, and the top and bottom of the cavity is critical — a rainscreen only works if water can actually enter and exit the gap as designed.
What products are used to build a rainscreen system?
Common products include water-resistive barrier membranes, furring strips or engineered sub-framing, drainage mats or matrix products that create the cavity, cladding-specific clips or fasteners, and the cladding itself. The right combination depends on cladding weight, wall type, and local code requirements.
What's the best rainscreen approach for vertical siding?
Vertical siding typically needs horizontal furring strips or a horizontal drainage mat pattern to create a path for water to drain downward and air to move through the cavity, since the framing runs perpendicular to the siding orientation. Top and bottom ventilation openings still apply.
Do I need a dedicated drainage mat product for a rainscreen cavity?
Not always — furring strips or grid systems can create the same air gap without a manufactured mat. Drainage mat products are useful where cavity depth is limited or where a consistent, code-documented gap dimension is needed, but they're one option among several, not a requirement.
 Guidelines
 Guidelines
 Guidelines
 Guidelines
 Guidelines
 Guidelines